Elevate Your Homecoming Mum with the Right Ribbons: A Guide to Homecoming Mum Ribbon, Rhinestone Ribbon, and Decorative Ribbon
Homecoming mums are more than just school spirit accessories—they are wearable stories built from layers of ribbon, trinkets, bells, and personal meaning. Whether you are crafting a traditional Texas-style mum or designing a modern, simplified version, the ribbons you choose determine the final look, weight, and durability. From the foundational Homecoming mum ribbon to the playful shine of rhinestones and the creative flexibility of decorative accents, each ribbon type plays a distinct role. This guide breaks down how to select, layer, and combine ribbons so your mum looks polished, personal, and photo-ready.
The Heart of the Tradition: Choosing Homecoming Mum Ribbon
At the center of every mum is a strong, flexible ribbon that can support the weight of flowers, trinkets, and braided loops. Homecoming mum ribbon is typically wider and more structured than standard craft ribbon, which helps it hold its shape throughout a busy school day and evening events. Satin and grosgrain are popular choices because they resist fraying and provide a clean backdrop for smaller embellishments. For a classic look, choose a ribbon that matches your school colors and pair it with a contrasting braid or backing ribbon.
Why Texture and Width Matter
Texture affects both appearance and performance. Satin offers a glossy finish that photographs beautifully, while grosgrain adds a subtle ribbed texture that grips knots and bows more securely. Width is equally important: a 2.5-inch ribbon often serves as the main base, while 1.5-inch and 7/8-inch ribbons work well for loops, streamers, and layered accents. If you are building a larger mum, use a wider base ribbon to prevent sagging and to distribute weight evenly.
“A well-chosen base ribbon does not just look better—it makes every embellishment easier to attach and more likely to stay put.”
Adding Sparkle with Rhinestone Ribbon
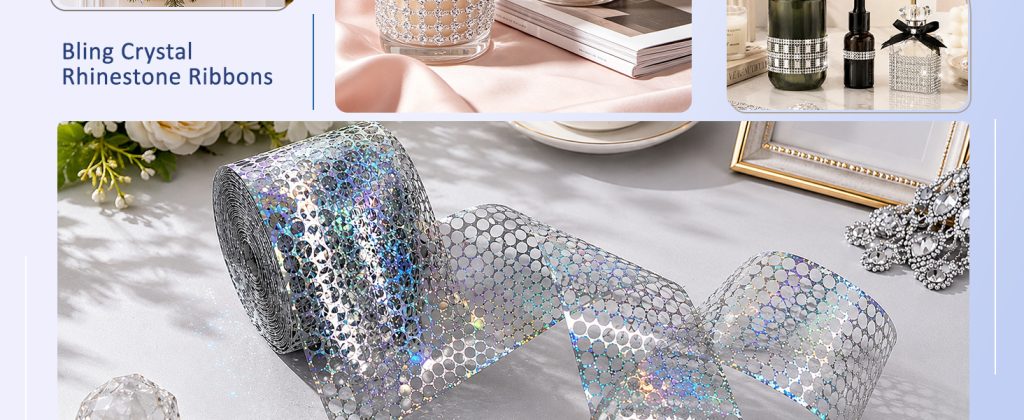
No homecoming mum has to be plain, and Rhinestone ribbon is one of the fastest ways to add glamour without extra bulk. This ribbon catches light from every angle, making it ideal for senior mums, dance team mums, or any design that needs a little extra sparkle. You can use rhinestone ribbon as a narrow accent strip along the center of a wider ribbon, as a border around loops, or as a sparkling tail that hangs beneath the main mum.
Placement Tips for Rhinestone Ribbon
- Use it sparingly: A single rhinestone strip can be enough to draw the eye without overpowering the school colors.
- Reinforce the ends: Rhinestone ribbon can be heavier than plain ribbon, so secure the ends with hot glue or strong double-sided tape.
- Mix with matte textures: Pair shiny rhinestones with satin or grosgrain to create contrast and depth.
- Keep it away from sharp trinkets: Position rhinestone ribbon where it will not rub against bells or metal charms that could loosen the stones.
Layering with Decorative Ribbon
Layering is where a mum becomes truly personal. Decorative ribbon includes printed patterns, glitter finishes, mesh, lace, and seasonal designs that can transform a simple base into a themed keepsake. Think beyond school colors: a subtle polka dot, a metallic edge, or a floral print can add personality while still complementing the overall palette. The key is to choose decorative ribbons that share at least one color with the base ribbon so the design feels intentional rather than chaotic.
Color and Pattern Coordination
Start with one dominant color, add one metallic or neutral accent, and then introduce a pattern at a smaller scale. For example, a navy base ribbon can pair with a silver rhinestone strip and a navy-and-white striped decorative ribbon. If you want a more whimsical mum, use a glitter decorative ribbon as the top layer and keep the rest of the design relatively simple. Remember that small patterns tend to read better on narrow ribbons, while bold prints work best on wider accent strips.
A Step-by-Step Ribbon Strategy
- Build the base: Cut and seal the main homecoming mum ribbon, then attach it securely to the mum backing.
- Create loop layers: Fold and staple or glue loops in descending widths for a cascading effect.
- Add sparkle: Run rhinestone ribbon along the center of selected loops or use it to frame the mum’s focal point.
- Introduce decorative accents: Tuck decorative ribbon into the loop layers, allowing tails to hang naturally.
- Secure and inspect: Check every attachment point, trim frayed ends, and make sure the mum hangs evenly.
Common Mistakes to Avoid
- Overloading the top layer: Too many heavy embellishments can pull the ribbon out of shape.
- Ignoring ribbon direction: Printed ribbons with a directional pattern need to be cut and placed consistently.
- Skipping heat-sealing: Frayed ends make even the most beautiful mum look unfinished.
- Using only one texture: Mixing satin, rhinestone, and decorative ribbon creates visual interest and depth.
When you combine a sturdy base, a thoughtful sparkle layer, and expressive decorative accents, your mum becomes a balanced piece that is comfortable to wear and beautiful to display. Take time to plan the ribbon order before you glue anything down, and do not be afraid to audition a few combinations. A successful design should feel festive, personal, and durable—just like the tradition itself. With the right Homecoming mum ribbon, rhinestone details, and decorative layers working together, your mum will stand out in the best way possible.